Using JDeveloper 12c and Maven as a build tool, users know that there are problems with this configuration. The first Maven integration was a real bumpy experience. Later 12c versions (12.2.1.x) got better and better. JDeveloper version 12.2.1.4 fixed most bugs. However, one thing broke with 12.2.1.4. You can’t run JUnit tests on an ADF model project with Maven!
I’m talking about JUnit tests for the model project of an application. I’m not talking about UI testing here. Such tests run outside JDeveloper using the maven-surefire-plugin.
In the first part of this blog, we set up an ADF application with Maven as the build tool, add another project that we use for JUnit tests of the before created model project. The second part shows how to implement a workaround for the error thrown by the maven-surefire-plugin we run into at the end of part one.
When you create an ADF application, you usually end up with two projects, at least. The ViewController project and the Model project. You should write JUnit tests for the model project, as this makes it easier to generate high qualitative software. Moreover, creating such tests is pretty easy as the base artifacts for the JUnit tests are created automatically by executing a wizard in JDeveloper. As a developer, you can concentrate on writing meaningful tests.
JDeveloper and JUnit
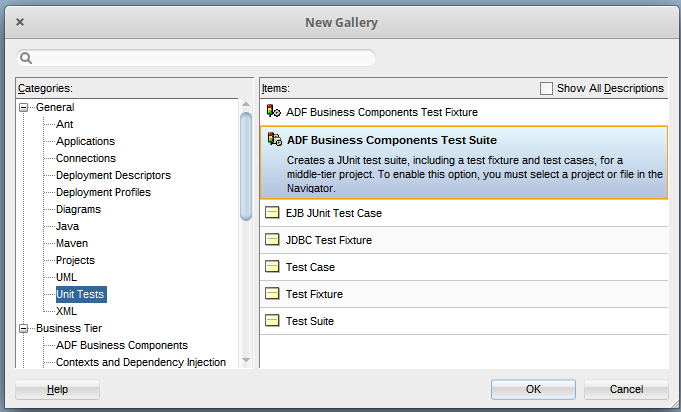
JUnit is a framework for testing software and is available in JDeveloper for a long time. In the earlier versions, you needed to install a couple of extensions, in the 12c versions JUnit is integrated with JDeveloper. What all Developers have to do to create JUnit tests is to open the gallery and to select ‘Unit Tests’ from the general section of the gallery:
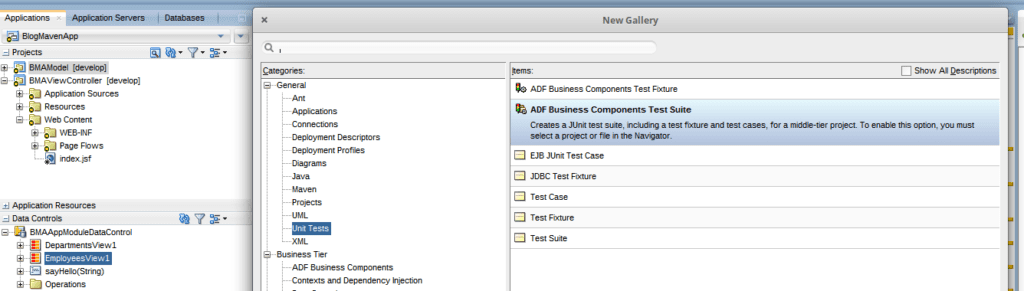
Here you get all kinds of possible tests artifacts to create. In the remainder of this blog, we are using the individual ADF artifacts only. One reason for this is that the ‘ADF Business Components Test Suite’ will create everything you need to get going with JUnit testing.
ADF and JUnit
Unit testing an ADF Model project means that you have test cases that communicate with the DB and use EntityObjects and ViewObjects to allow the test to work with the data from the DB. When you run an ADF web application, the model sets up the DB connection as part of the session, and the developer doesn’t have to think about how or when to create an application module.
When you run a unit test for ADF Business Components, the web part is missing. The creation of an application module is a task of the test. ADF helps us by providing a class and method that does this:
Configuration.createRootApplicationModule(…)
The createRootApplicationModule method should only be used in this kind of scenario (see ‘When to use “createRootApplicationModule” in Oracle ADF’).
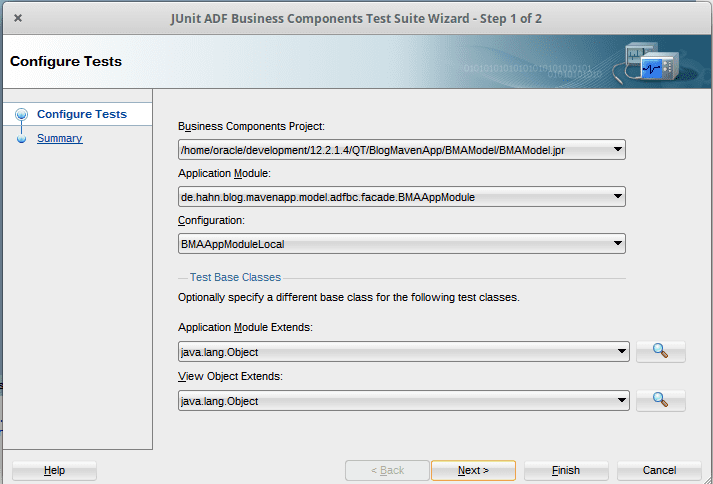
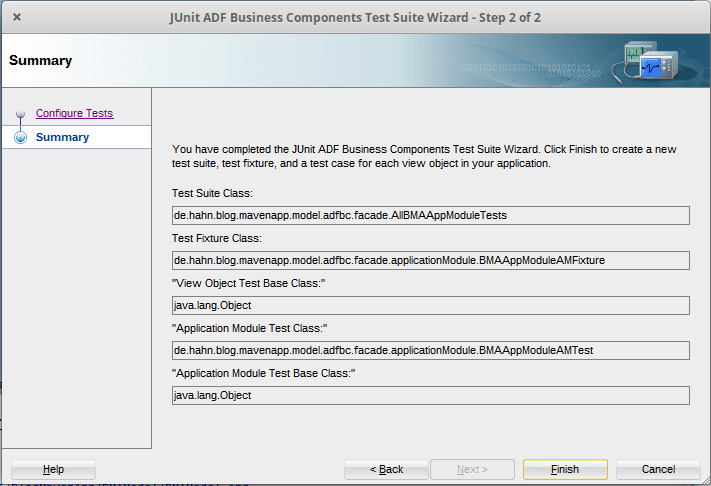
When you create an ‘ADF Business Component Test Suite’, you get a class holding a ‘fixture’. This fixture creates the application module when you instantiate the class. The other artifacts created are test classes for each view object and each method of the client interface of view objects and application module.
Building JUnit Tests
In the remaining part of this part of the story, I show how to create JUnit tests for an existing ADF Web Application. If you like to follow carefully, you can download the base application from GitHub.
The base application is an ADF Web Application using the HR DB schema to read and write data to the DB. The Application module has one other method sayHello(…) that is used to show how to test such application module methods.
There are two locations where you can create JUnit tests. First, you can create them as part of the Model project together with all other classes. Secondly, you can create a separate project for testing. An independent project allows us to create all the test classes outside the regular model project.
I prefer the second method as the test classes don’t clutter the model project.
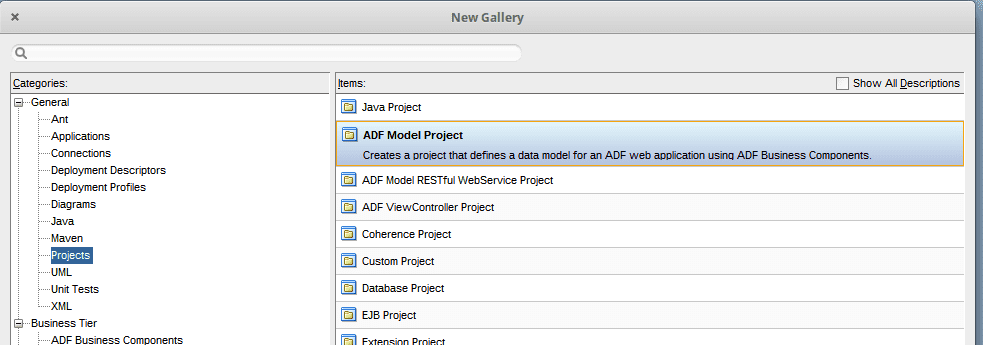
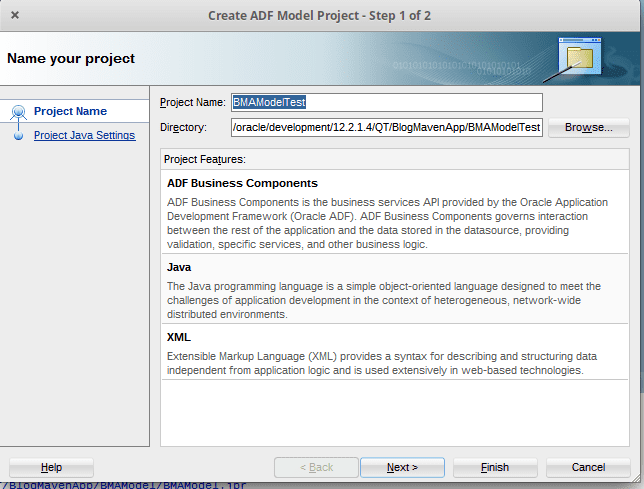
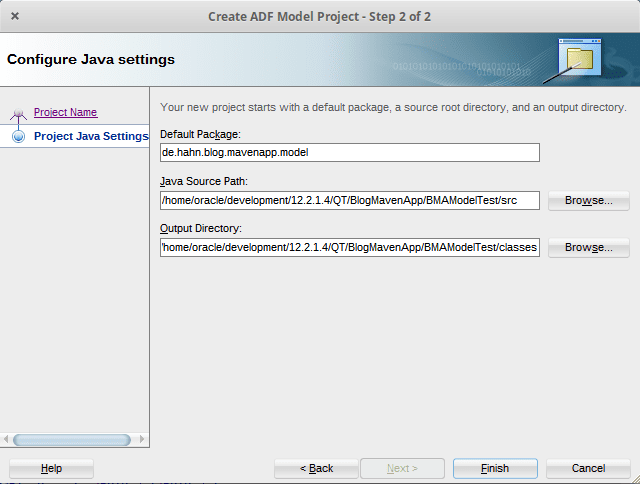
First, we create another ‘ADF Model Project’. We can use a ‘Custom Project’, but then we need to add more dependencies later.
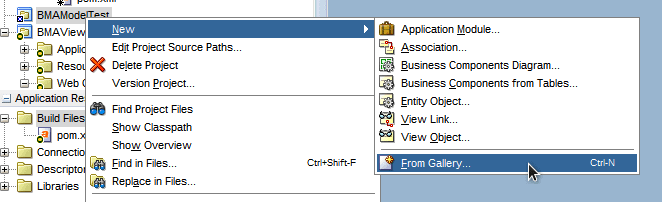
Once the project exists, we right-click on it and select to create ‘ADF Business Component Test Suite’ from the gallery:
After finishing the wizard, the framework creates all needed artifacts. However, the created tests are very rudimentary. We need to develop better tests and/or change the test cases generated.
If you look at the created project, you’ll notice that it is an ADF Model Project using JDevelopers internal built system, not Maven.
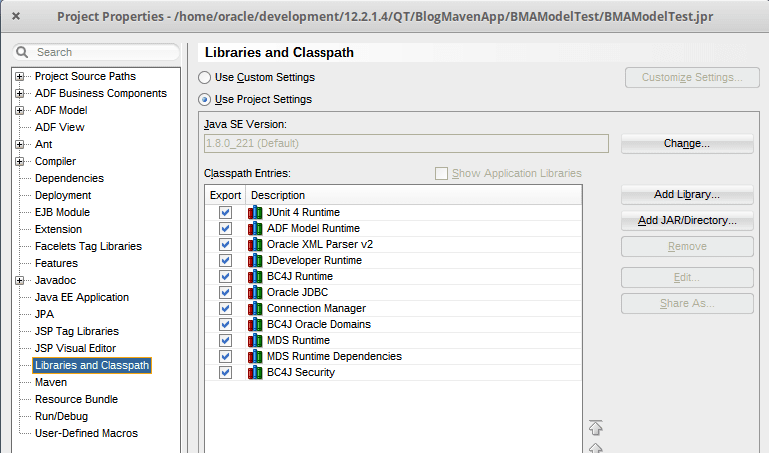
Checking the projects ‘Library and Classpath’ looks like
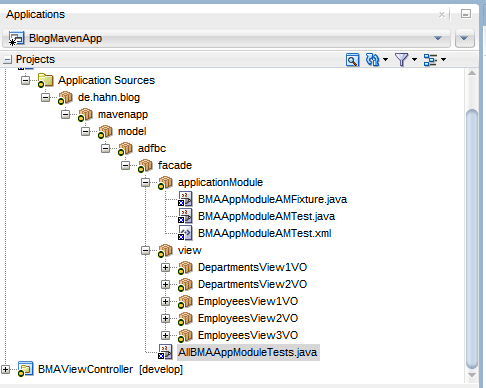
The generated artifacts are
Running JUnit Tests
Compiling and running the AllBMAAppModuleTests as JUnit Test will get you some errors
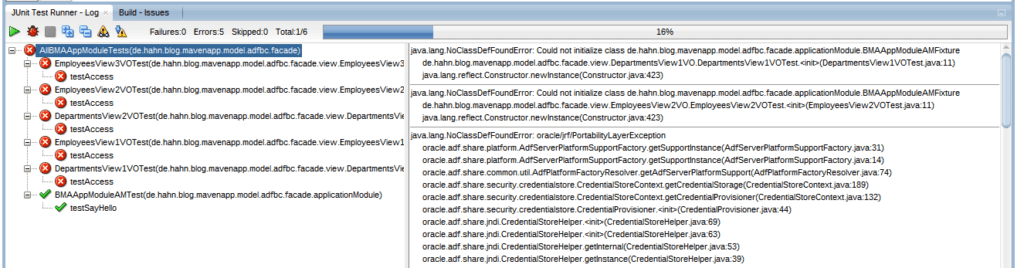
The reason for this is that a library is missing in the ‘Library and Classpath’ section. The error complains about
java.lang.NoClassDefFoundError: oracle/jrf/PortabilityLayerExceptionSearching for this class, we find it in e.g., the ‘BC4J Tester’ library, and add this to the project. Now the Junit tests run green, but keep in mind that they are very simple currently.
To make sure that the tests can access the DB we implement a test that counts the number of rows in hte employee table
@Test
    public void testCountRows() {
        ViewObject view = fixture1.getApplicationModule().findViewObject("EmployeesView1");
        long count = view.getEstimatedRowCount();
        assertEquals("The number of rows is wrong!", 107, count);
}
This test runs OK. Another test case checks if we can call the method exposed by the BMAAppModule sayHello(…)
    @Test
    public void testSayHello() {
        BMAAppModule am = (BMAAppModule) fixture1.getApplicationModule();
        String hello = am.sayHello("Junit Test");
        assertEquals("Method returned wrong message!", "Hello Junit Test!", hello);
    }
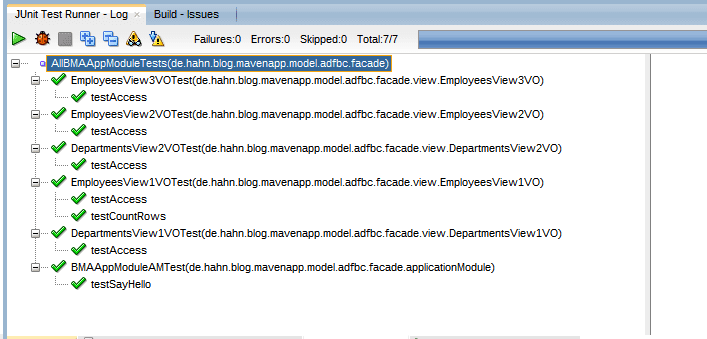
This test runs OK too. Running all test cases results in
The final task is to make the test project build with Maven.
Making the Test Project Maven Aware
First of all we need to create a pom.xml file for the project. The JDeveloper allows us to create a ‘Maven Pom for Project…’
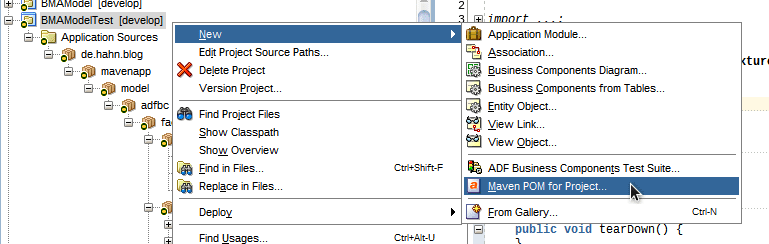
If you don’t see this directly, choose ‘From Gallery…’ and look into the Maven section. This starts a wizard where we add some Maven needed properties:

The only thing we need to do is check the ‘ADF Plugin Settings’ The wizard creates the pom.xml, and we can now use Maven to build the project.
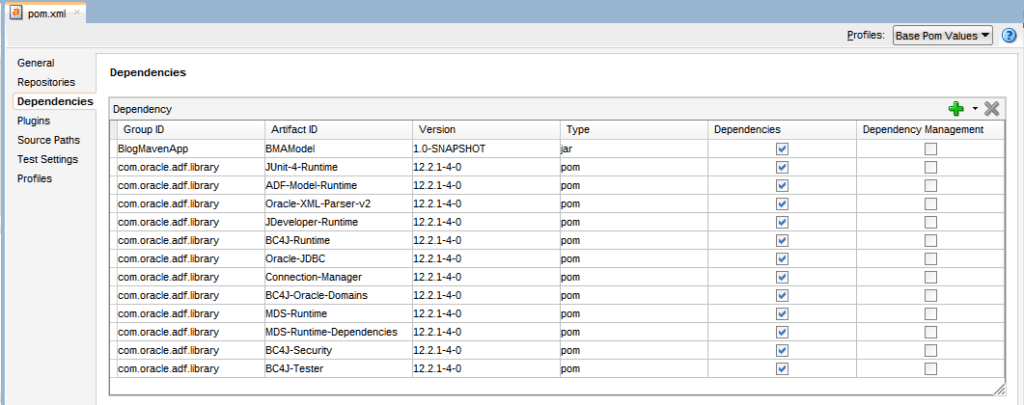
Checking the dependency section the pom.xml we see the same dependencies as we saw before in the ‘Library and Classpath’ section
Running Maven Test
Running the Maven ‘test’ goal of the new project we see that no test run
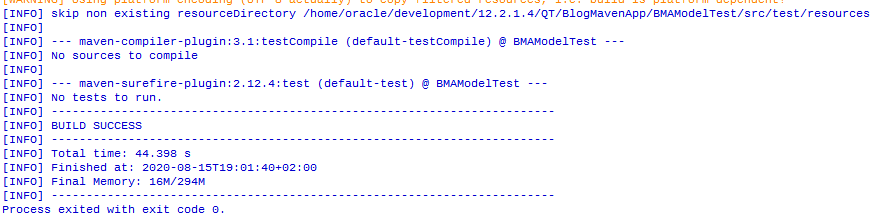
Why’s that?
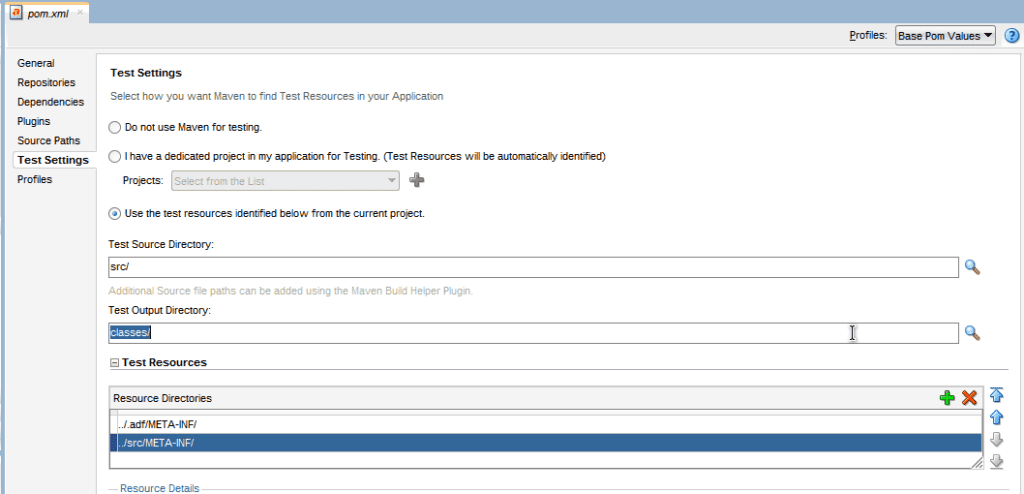
Checking the ‘Test Settings’ section of the pom.xml we see that there is nothing set:
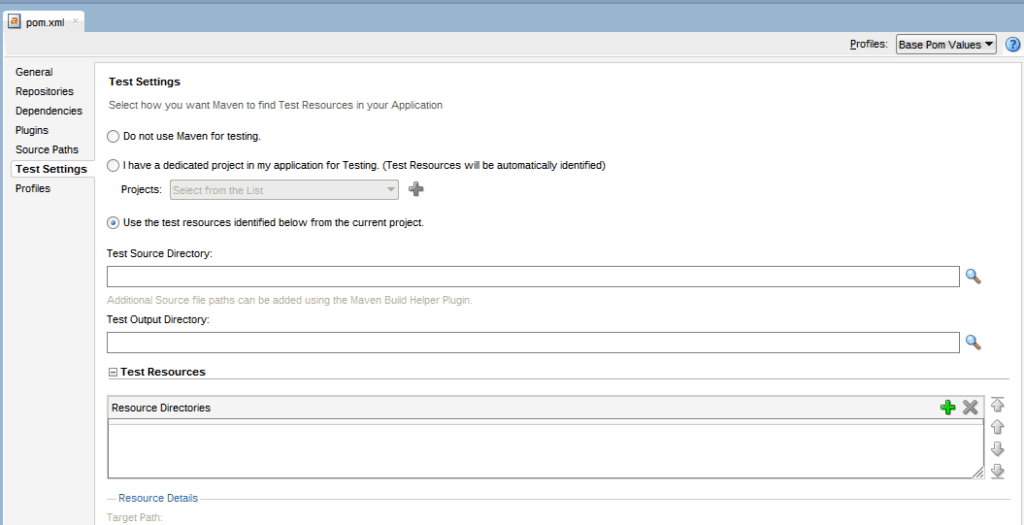
The maven-surefire-plugin needs to know where to look for the test cases. We make the needed additions and add the path to the ADF meta data directories too:
Running the ‘test’ goal again, the maven-surefire-plugin executes the tests:

However, the result of the first test is an error:
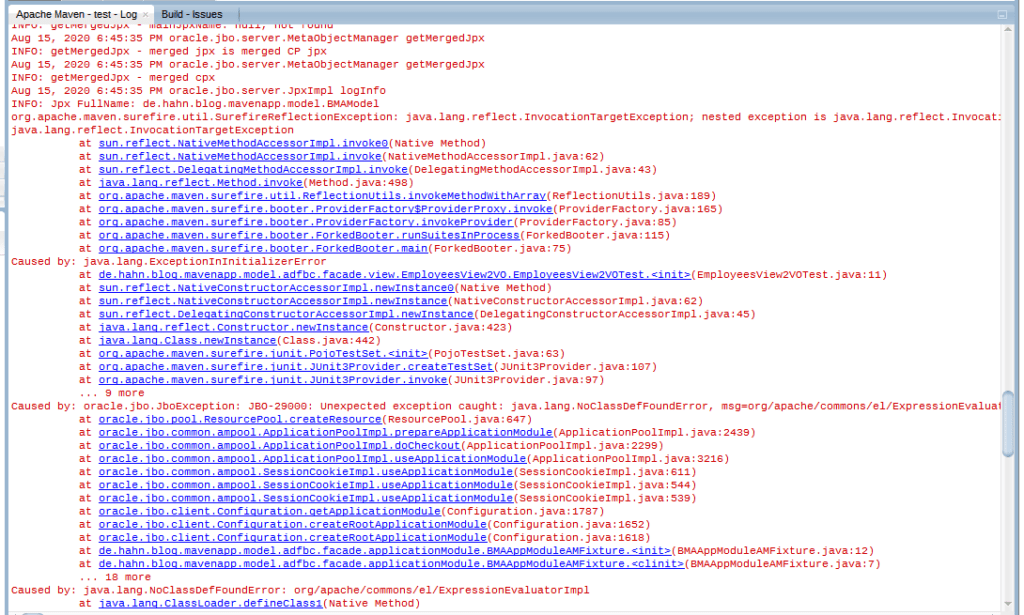
To cut things short, a couple more libraries or jars are missing. It seems that the poms included by JDeveloper don’t add all jars needed to run the tests.
We add the missing jars to the pom.xml to end up with six added jars:

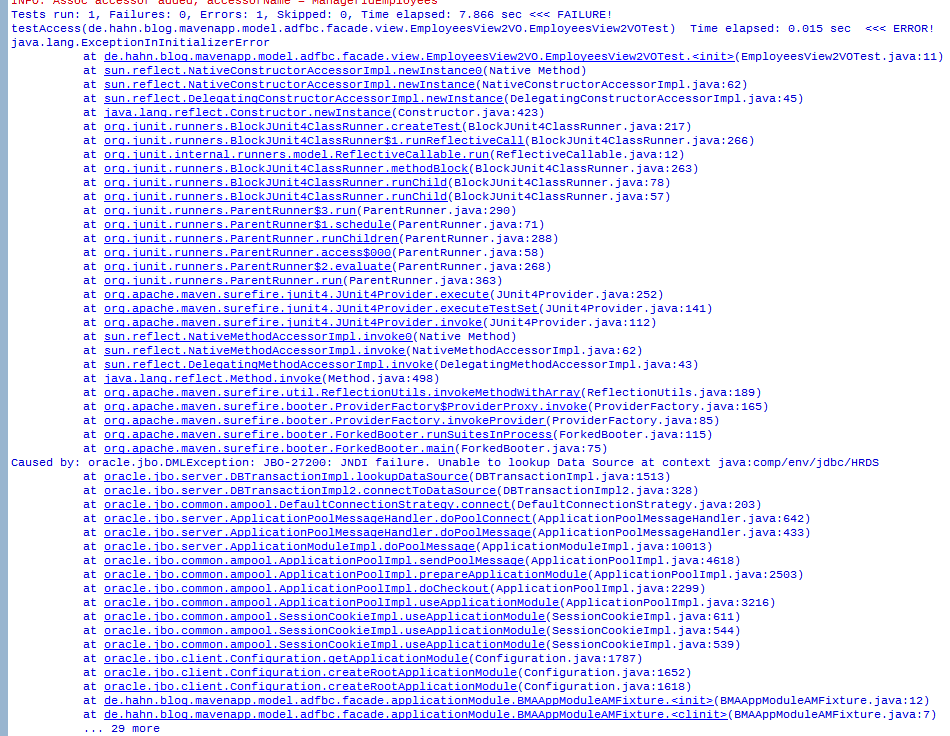
Running the ‘test’ goal again we see that the tests had run but all errored out 🙂

A look at the stack traces provided by the tests reveals that the looup of the needed DB connection doesn’t work.
Nothing I tried fixed this problem 🙂
I filed a Service Request with support.oracle.com, they acknowledge that there is a problem, but they have not delivered a fix for the problem jet.
In the next part of the blog, I show how to implement a workaround for the problem. Hopefully, it won’t take much longer. I’m waiting for eight months already.
At this stage, part one finishes. In the next part, we see how to implement a workaround for this and make the JUnit tests run with Maven.

- ADF: Dump Query and ALL VO Query Parameters - 21. Juni 2021
- Pass User and ApplicationModule Information to Database Session - 30. März 2021
- JDeveloper 12c: af:tree show/hide expand icon depending on the number of children - 25. Februar 2021


